HubSpot Integration
A Step-by-Step Guide for When Someone Completes Your Estimator to Easily Integrate and Find Your HubSpot Tracking ID
Integrating your HubSpot tracking ID with other platforms can help you streamline your marketing, sales, and service data. Follow these steps to find and copy your HubSpot Tracking ID:
Step 1: Log in to Your HubSpot Account
Make That Call: Speed is of the essence.
Start by logging into your HubSpot account. You can do this by visiting the HubSpot website and entering your credentials.
Step 2: Access Your Settings
Once you’re logged in, navigate to the main menu located in the top right corner of your dashboard. Click on the ‘Settings’ icon, which typically looks like a gear.

Step 3: Go to Tracking & Analytics
In the left sidebar of the Settings page, look for ‘Tracking & Analytics’.
Step 4: Select Tracking Code
Under the Tracking & Analytics section, you’ll find an option labeled ‘Tracking Code’. Click on it to access the page where your HubSpot tracking ID is located.
![]()
Step 5: Copy Your Tracking ID
On the Tracking Code page, you will see a section labeled ‘HubSpot Tracking Code’. Here, you’ll find your unique tracking ID embedded within a snippet of JavaScript code.
Carefully select the ID (it typically begins with ‘id=’ followed by a series of numbers and letters) and copy it to your clipboard.
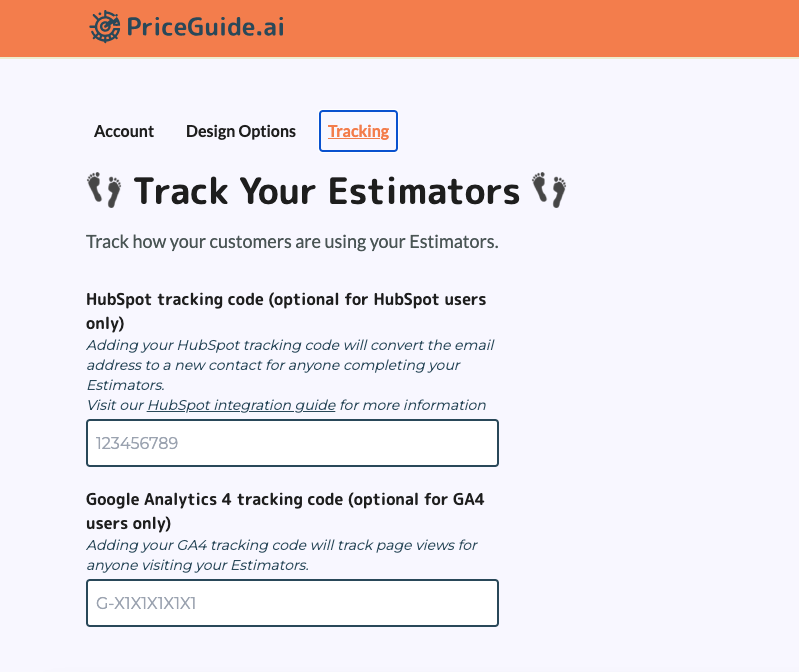
Step 6: Adding your Tracking ID
Now that you have your tracking ID copied, go to your PriceGuide.ai app dashboard, click onto “Account” -> “Tracking” page, and then add in your tracking ID code to the HubSpot tracking code box.
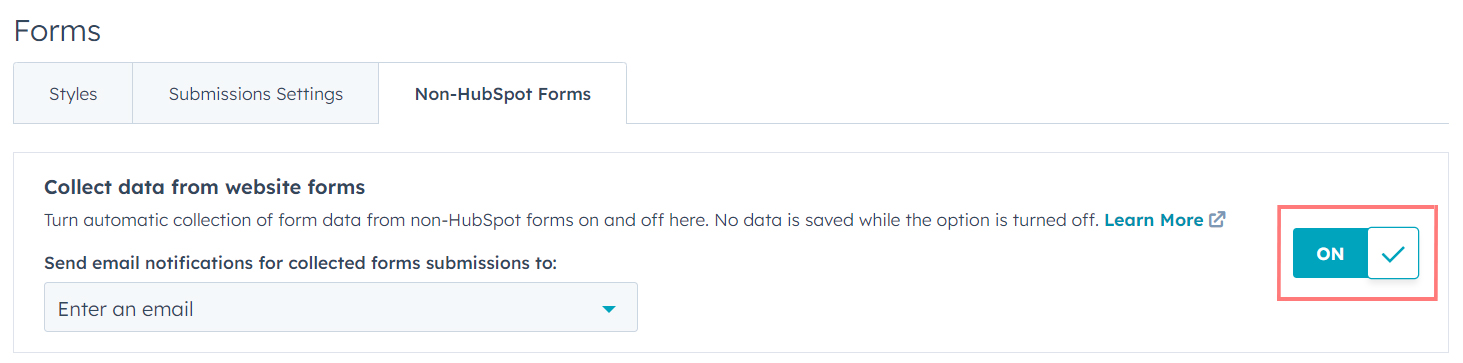
Step 7: Enable Non-HubSpot Form Tracking
To also capture the name, phone, zip and more, go back to your HubSpot Account, click onto HubSpot “Settings”, then click on “Marketing”, then click on “Forms”, then click on “Non-HubSpot Forms”.
Make sure this is ON.
It should look something like this:
On This Page:
- Log in to Your HubSpot Account
- Access Your Settings
- Go to Tracking & Analytics
- Select Tracking Code
- Copy Your Tracking ID
- Adding Your Tracking ID
- Additional Option: Enable Non-HubSpot Form Tracking
Have More Questions?
We’d love to hear from you.