Advanced Content Customization Settings
This guide explains how to override default text settings in your estimator, allowing you to personalize the content to better suit your needs.
Here’s how to get started:
Step 1: Access Your Estimator
If you have an existing estimator, start by editing it. If this is your first estimator, proceed to the next step.
Step 2: Navigate to Content Customization
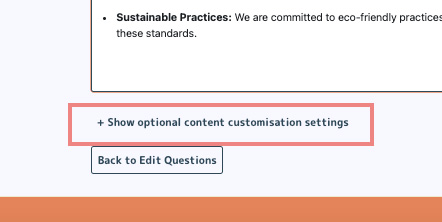
In Step 5 (Edit Your Results Page Content), scroll to the bottom and click on the text that says “+ Show optional content customization settings.”

Step 3: Edit Content Sections
Make the necessary edits in each section according to your preferences, as illustrated in the images below.
Start of Quiz Text
Purpose: Set the tone for your quiz and provide clear instructions.
- Locate the “Start of quiz text” field in the customization menu.
- Enter a short and engaging question or instruction that will help users understand what to do, such as “Which services do you require?”
- Ensure the text aligns with your brand voice and encourages interaction.

Pre-Submission Prompt
Purpose: Inform users about what happens next and encourage them to complete the form.
- Scroll to the “Pre-submission prompt” section.
- Add a message that reassures users, like:
“Almost There! See Your Results Instantly. Just enter your info below, and your estimates will pop up instantly! We’ll also send a copy to your inbox for easy reference.” - Use a friendly tone that reflects your brand.
Email Description Text
Purpose: Explain what users will receive in their inbox.
- Locate the “Email description text” field.
- Add a brief, clear message that explains the content of the email. For example:
“Your estimator results will also be emailed to you along with relevant information to help you make an informed decision.” - Keep the language professional yet approachable.
Email Signature
Purpose: Add a personalized and professional touch to your email communication.
- Navigate to the “Email Signature” section in the email settings.
- Customize the signature with your business details, such as:
“Best regards, [Your Name/Business Name]” - Optionally, include a link to your website or social media handles.
Embed a Video to Your Results Page
Purpose: Provide additional value or explain your services with a video.
- Go to the “Results Page” customization settings.
- Click the option to “Embed a Video.”
- Paste the URL of your video (e.g., YouTube, Vimeo) into the provided field.
- Ensure the video is relevant to the results and provides extra context or a call to action.
Add Custom Links
Purpose: Direct users to additional resources or actions.
- Locate the “Custom Links” section in the customization panel.
- Add URLs for resources, such as:
- Service pages
- Contact forms
- Related blog articles
- Label each link clearly, e.g., “Learn More About Our Services” or “Contact Us for More Details.”
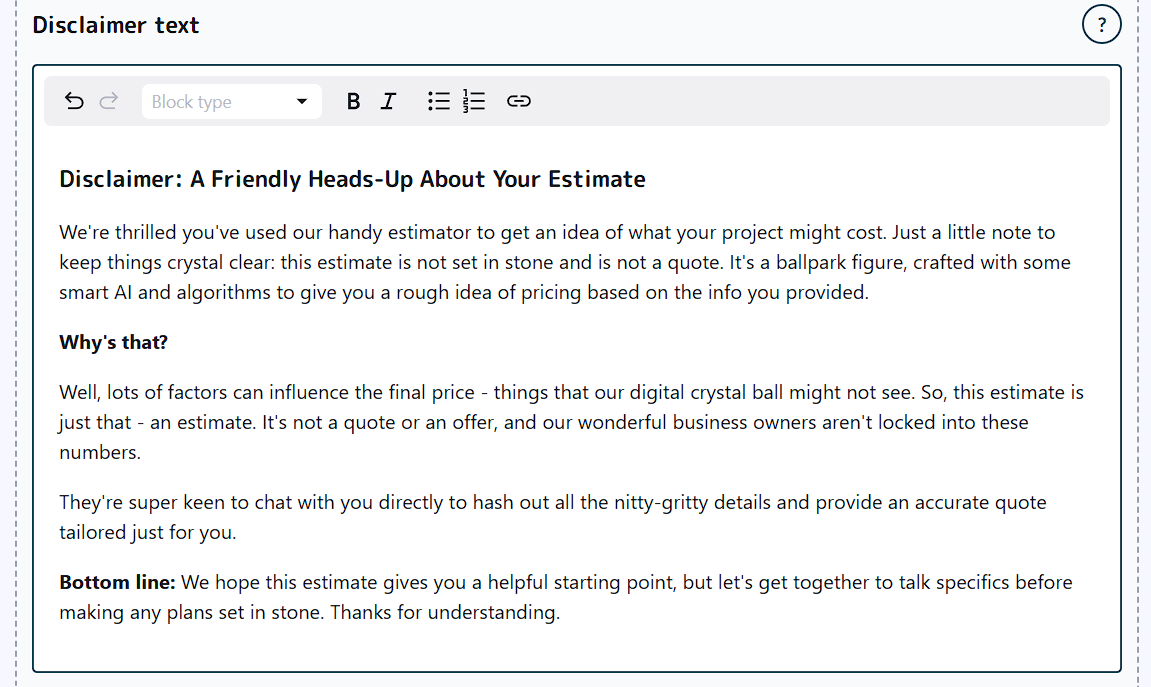
Disclaimer Text
Purpose: Set expectations and clarify that estimates are not final quotes.
- Scroll to the “Disclaimer Text” section.
- Input a friendly yet professional disclaimer, like:
“This estimate is a rough idea of pricing based on the information provided. It’s not a quote or offer. For a precise quote, please contact us directly.” - Highlight key points in bold to ensure they stand out.

Step 4: Save Your Changes
Once you’re satisfied with your edits, click “Save Estimator” to apply your changes immediately.
On This Page:
Have More Questions?
We’d love to hear from you.


